Showing posts with label Blogging Tips. Show all posts

How To Add Facebook Like and Send Button To Blogs


Go To Blogger > Design > Edit HTML

Backup your template

Click Expand widgets templates box

Search for <data:post.body/>

To add the plugin just below your post titles then add the giant code below just above <data:post.body/>

<div id="fb-root"></div><script src="http://connect.facebook.net/en_US/all.js#xfbml=1"></script><fb:like href="" send="true" layout="button_count" width="450" show_faces="false" font=""></fb:like>

Hit save

How To Create A Favicon Icon Of Your Blog Or Website

Create Your Favicon


A favicon is nothing more than a 16 pixels by 16 pixels icon, and the file has a .ico extension.

Favicons are very simple image icons, meaning that even Microsoft Paint should be enough to create a good looking one. The easiest way is to create a 32 x 32 pixels JPEG image with Paint and then use the online service “Favicon from Pics“ to convert the JPEG image into a favicon.ico file.

Once you are done with the favicon.ico file you should upload it to your site. Just make sure you place it in the root directory, which is the directory where the index file is located.

Now Finally you have to do is
<head> and </head> tags. All you need to do is to add the following line:

<link rel="shortcut icon" href="/favicon.ico" type="image/x-icon" />

This code will only work if the favicon.ico is located in the root directory.

How To Insert An background image into the html page

It is just for a simple blogger page and html page. So if it is not work in ur blogger html coding dont get panic.
Now how to set the background image.
Search <body> Tag and write body attribution under the body tag like this....
<body backgroung="C:\Users\Public\Pictures\Sample Pictures" >

Note:- Here C:\Users\Public\Pictures\Sample Pictures is the image path addresses of your computer
How to get image path addresses of your computer
1- Choose the image from your computer you want to display
2- Right Click on the picture go to properties and copy the location and paste it to the given place

How To Increase The Alexa Ranking Of Your Blog Or Website


Alexa Internet, Inc. is a California-based subsidiary company of Amazon.com which provides commercial web traffic data. Founded as an independent company in 1996, Alexa was acquired by Amazon in 1999.
Alexa is the leading provider of free, global web metrics. Search Alexa to discover the most successful sites on the web by keyword, category, or country. Use our analytics for competitive analysis, benchmarking, market research, or business development. Use Alexa's Pro tools to optimize your company's presence on the web.

NOW TO INCREASE ALEXA RANKING

STPEPS TO FOLLOW:-

 1 – Claim Your Website
2 – Installing Alexa Toolbar
3 – Build Good number of High Quality Backlinks
4
– Use Alexa Widgets on Your Website or
Blog
Alexa Site Stats Button
    How to Increase Alexa Ranking of your site
    Alexa Traffic Rank ButtonHow to Increase Alexa Ranking of your site
    Alexa T
raffic GraphHow to Increase Alexa Ranking of your site
5 – Regularly Update Your Website
6 -  Try to Build Traffic from Tech-experts and Bloggers
7 – Share Your Website Content on Social Networking Sites
8 – Link Back to Alexa Website by Writing a Review on Alexa.com
9 – Tell Your Friends or Visitors to Write Review of Your Website on Alexa
10 – Write Unique and High Quality Content Posts

How To Get Free 25000 Backlinks For Blogger Or Website

Now A days Blogging is a good way to Make Money online , but the most important is how to get best ranking in SEO ang how to get more visitors or traffic .
IMT Website Submitter submits your website/blog to 3,000+ different places.
This script creates pages about your website/blog on everyone of these websites, resulting in about 3,000+ different pages with backlinks pointing back to your website. Yes some of them are no-follow and some of them are do-follow, but bottom line is that these are well established websites regularly crawled by Google and other SE, so your pages and backlinks on those websites will be found and your website/blog will get backlinks and will be visited and indexed more frequently by Googlebot and mainly other search engine bots like Yahoo, Bing, Baidu, etc
 Now How To Do This:-
1. Go to IMTK
2. Fill the form whatever it says
     whick is look like this
 2500 Free Backlinks  
Now this tool created the pages also pinged.
Blogging Tips and Tricks
 

Increase Your Blog Traffic with Comments, Conversation and Community

When you make the decision to start a Blog .it's likely that you want people to visit it. In other words, you want to start a blog that has a good chance of being successful. Even your mother won't visit your blog if it's boring. Follow the 5 elements of successful blogs below to ensure you're on the right track from the moment you create a blog.

Commenting are the lifeline of a blog. Ask your readers to leave comments, request their opinions and respond to them promptly. Make them feel like they are valuable members of your blog and take the time to develop relationships with them. Develop a blog comment policy so visitors' expectations are set upfront and your loyal readers are protected.

2. Conversation

You need to start the conversations on your blog by writing compelling blog posts that invite readers to join in. Keep your content fresh and entertaining. Research your audience and your blog statistics to learn what your audience wants from your blog then write content that meets their needs. When your readers take the time to join in the conversation, make sure that conversation is truly two-way by responding and making your readers feel comfortable in expressing their thoughts and opinions on your blog.

Community

When comments and conversation starts flowing on your blog, a community will naturally develop around it. Your goal as the blogger is to keep the community entertained, interested and on topic to ensure your entire audience continues to derive value from your blog. Too many tangent conversations about Reader A's cat on a blog that is not about cats, will bore the rest of your audience and drive them away. You need to act as the conversation starter, motivator and moderator to develop the strongest community and to achieve the greatest success.

How To Customize the Blogger Templates

Customize the Template

To customize your template, open the options menu from Blogger's dashboard and choose the 'Layout' option.  From here, you'll be able to customize the layout of your page.  To move an element to a new location, simply drag and drop into the item into it's new home.  You can juggle your elements until you're happy with their placement.

Add Elements to Blogger

If you want to add more elements to your page, click the 'Add a Gadget' option.  Here you'll have a wealth of options that you can add to your blog.  Cycle through the whole list, or just select the ones you want and press the plus button to add them to your page.  Each gadget will have different settings, so be sure to check each one before you add it.  A +1 button, for example, has different size options in order to fit different blog types.  When you're ready, click Save and you'll find your new gadget waiting for you on your page.

You can edit any of your existing elements at any time by clicking the edit option.  Remember, each element will be different, so it's worth checking each one out to add that extra personal touch.

When you're happy, head to the top right of the screen and choose 'Save arrangement' to save your new layout.  You can also preview your layout before you save, just to make sure it's what you want.

Don't forget, all of these options will also be available in the Template designer, found by heading to the Template menu and choosing the 'Customize' option.  Just head to the Layout tab and you're good to go!

How To divide The Page Into Rows Insteal Of Cols

The <frameset> tag does all the dividing of the page into different windows . It also has attributes that specify how t divide them up. Can we divide the page into more than 2 pieces ? Yes , just make sure that you specify a page to ocupy each section or the browser will get confused . Look at the code below.

A PAGE WITH FIVE FRAMES
For dividing the page into cols :-

<HTML>
<HEAD>
<TITLE>MY FRAME PAGE-THE MASTER PAGE</TITLE>
</HEAD>
<FRAMSESET COLS= "20%,20%,20%,20%,20%">
<FRAME SRC="ONE.HTM">
<FRAME SRC="TWO.HTM">
<FRAME SRC="THREE.HTM">
<FRAME SRC="FOUR.HTM">
<FRAME SRC="FIVE.HTM">
</FRAMESET>
</HTML>

Now for dividing the rows :-
By Replacing the word COLS  from the above code ROWS
for more Blogging Tips

How To Index The Website Or Blog In Blog

I am  Directly telling What To do without any time waste or explanation.
Steps:-

 Type your blog URL in the address bar of your web browser.


 At the end of your URL, append /robots.txt and hit Enter.
  http://bloggingtiptricks.blogspot.com/robots.txt
 
 It will open up a simple page with text. As you see at the end, you can find your default sitemap address      for your blog.


Also you can make use of below instead of what you found,

Your Url/atom.xml?redirect=false


To include all your page URLs in the sitemap, you need to use below modified sitemap address,

Your Blog Url/atom.xml?redirect=false&start-index=1&max-results=No. Of Posts


Or


Your Blog Url/atom.xml?redirect=false&start-index=1&max-results=No. Of Posts


Submit Your SiteMap In Google


More Blogging Tips

HOW TO REMOVE THE BLOGGER COMMENT BOX FROM BLOGGER PAGES

  • Go to Template” –> “Edit HTML” --> "Proceed"
  • Now search for </Head> [Tip: press CTRL+F]
  • Paste the Following codes just above the </head> 
 <blockquote>
<b:if cond='data:blog.pageType == &quot;static_page&quot;'>
<style>
#comments {
display: none;
}
</style>
</b:if>
</blockquote>
save your Template

 More Blogger Tips

What Are Advantage And Use Of Facebook Comment Box

Traffic Booster

When a user decides to leave a comment at your blog using the FB comments box, he has the option to post or not to post the same comment on his Facebook profile.
POST A COMMENT
If chooses the option the this is how your Post appears on his profile,
    
One  visitor can also click the "Like" link under another visitor's comment. This way your Posts are circulated widely over Facebook which is the largest Social media network with 500 Million active users.
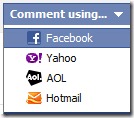
Your visitors no more needs to log into blogger or create an open ID. They can comment using either their FB ID, Hotmail, AOL or Yahoo. Almost every online user in the world uses at least one of these services. So you visitors are provided with multiple options to post their comments.

facebook-comment-box 
 Your readers no more need to feel neglected because you no more need to reply them all at once. Rather you can pay them proper attention by replying to each reader under their comments.

You will get more relevant comments with no spam as users will have to use their personal IDs to leave a comment and spam robots are surely incapable of doing that. Blogger comment form to delete a comment you need to click the trash icon and the you are taken to a separate window where you select the option of deleting the comment permanently. But With FB comment box you Delete comments just the way you delete comments on your FB profileThe links left on your comment box are by default tagged as nofollow and according to the FB developers search engine robots can not crawl the content of your comments as the plugin is enclosed inside a iframe where robots can not enter to crawl data

More Blogging Tips

How To Add A Header Image To Blogger or blogspot For A Dynamic Views

1.Go to template
2.Click customize than click background >background image
3. Upload your image
4.Hit done and adjust just your tile and if your image is fits the width than don't tile.
5.Select tile horizontally if it's  shorter than the width.
6.Adjust the allignment

If you ever want to remove the blog title on the header bar, do the following:


Back in the Template section, click on Edit HTML.
          
Look for ]]></b:skin> inside your template’s code using Ctrl+F.

Copy/paste the code below right before and above it.
 
  .header-bar {
   display: none !important;
   }     

Simple Ways To Improve Website Or Blog Traffic

I think you saw a many common ways in different websites to increase a blog or website traffic , but there is different and simple.  It is very common quesion that how to increase blog or website traffic  Now a days blogging and having website is common . So it is very to become proffesional blogger or having more traffic to their websites.
Now i will Tell you some simple steps to do :-

1. Providing interesting and informative information on your website will give visitors a reason to seek you out in the future. Also, fresh content gives new opportunities for Google to find you. Post blog entries, write studies and white papers, show some industry statistics - give them the good stuff! If they have a reason to visit.

2.Use the social media site www.triberr.com and form a tribe of like minded marketing folks. Through cross pollination of your blog and those within the tribe you can target traffic, not to mention increase Twitter Followers, Google +'s, and Facebook Likes. Leverage automation and let dlvr.it do the postings for you through RSS feeds. My traffic has increased 30% just by belonging to one active tribe.

3.You're the expert and face of your company. The #1 best way to drive traffic to your site is to create a series of videos. Build a YouTube Channel, link it to your site and have your SEO people go to town. The videos are short, upbeat, fun, compelling, interesting clips (about 2 minutes long) telling viewers about what you do - offer information, not selling. Don't have your cousin's kid do the videos either

4.Image tagging: We have increased traffic up to 30% on our client websites by doing this one simple tactic. Search engines (and humans) LOVE images. Just look at the meteoric rise of Pinterest. But can search engines find the images on your site? Not if they aren't "tagged". Go through your site and make sure every image is tagged with a proper "title" and "alt-tag" aka "alternate text". This helps search engines identify and properly index the image, bringing targeted traffic to your site.

5.Driving visitors to a website is one of my core skills for the last 16 years. One of my favorite methods is to create a related directory on your website. For example, if you are selling camping tents, create directories of well known camping clubs and national parks. Then, whenever someone is searching for the "Boston Camping Club" or "Yosemite", your directory page will appear just above or just below the clubs or park, giving you an unpaid ad in Google.

6.Grow your connections on LinkedIn by joining and interacting in groups. Each week, post your newsletter article in the discussion area of the groups and be sure to comment on the comments of others.

7.Offer something exclusive that clients/customers, or potential ones, can't get from you anyplace else. Whether it's a product, service, white paper, report, analysis or anything else, make it available only through your website. Then, use other social and traditional marketing channels such as email, social media, networking, snail mail, and advertising (whatever works for you), to tell them it's available only on your website.

8.Use SEO application software.

9.Optimize your videos on YouTube by putting your keywords in the title, description and tags. Put your website URL at the beginning of the video description. Place your keywords as captions in your video. Put your URL on a text page at the end of your video.

10.search drove traffic, slow connections limited the use of images, etc. Today, with Stumble, Pinterest, and other social networks giving you a half second to grab a viewer's attention, great visual imagery is essential for gathering "pins" and "likes" which will drive traffic directly, as well as build a foundation for further SEO improvement. Great text is still important to keep visitors and search engines, but great images attract people.

How To Hide The Label Tags and The Author Name In Blogger Posts

  1. Go To Blogger > Design > Edit HTML
  2. Backup your template
  3. Check the "Expand Widget Templates" box
  4. Search For,
<span class='post-labels'>
    5.  Now add the following code just above it,
<b:if cond='data:blog.url != "URL OF Selected Post"'>
Replace URL OF Selected Post with the Link of the page where you want to hide label tags.
    6.  Just 6-7 lines below the code you search for in step#4, you will find this,
</span>
    7. Just after it paste the code below,
</b:if>
    8. Save your template and visit that selected page and you will see that the labels are gone.

Hiding Author Name and Date Time On Selected Pages

Inside your template search for this,
<span class='post-author vcard'>
and just below it you will find a large code slightly similar to the one shown below,
<span class='post-author vcard'>
        <b:if cond='data:top.showAuthor'>
          <data:top.authorLabel/>
          <span class='fn'><data:post.author/></span>
        </b:if>
      </span>
      <span class='post-timestamp'>
        <b:if cond='data:top.showTimestamp'>
          <data:top.timestampLabel/>
        <b:if cond='data:post.url'>
          <a class='timestamp-link' expr:href='data:post.url' rel='bookmark' title='permanent link'><abbr class='published' expr:title='data:post.timestampISO8601'><data:post.timestamp/></abbr></a>
        </b:if>
        </b:if>
      </span>

You just need to add the following codes before and after the bolded blue lines as shown below,
<b:if cond='data:blog.url != "URL OF Selected Post"'>
<span class='post-author vcard'>
        <b:if cond='data:top.showAuthor'>
          <data:top.authorLabel/>
          <span class='fn'><data:post.author/></span>
        </b:if>
      </span>
      <span class='post-timestamp'>
        <b:if cond='data:top.showTimestamp'>
          <data:top.timestampLabel/>
        <b:if cond='data:post.url'>
          <a class='timestamp-link' expr:href='data:post.url' rel='bookmark' title='permanent link'><abbr class='published' expr:title='data:post.timestampISO8601'><data:post.timestamp/></abbr></a>
        </b:if>
        </b:if>
      </span>
</b:if>

To hide the labels and date and time on another page also then just repeat the same process. For example if you want to hide them on three selected pages then do this for date and time,
<b:if cond='data:blog.url != "URL OF Selected Post -1"'>
<b:if cond='data:blog.url != "URL OF Selected Post -2"'>
<b:if cond='data:blog.url != "URL OF Selected Post -3"'>
<span class='post-author vcard'>
        <b:if cond='data:top.showAuthor'>
          <data:top.authorLabel/>
          <span class='fn'><data:post.author/></span>
        </b:if>
      </span>
      <span class='post-timestamp'>
        <b:if cond='data:top.showTimestamp'>
          <data:top.timestampLabel/>
        <b:if cond='data:post.url'>
          <a class='timestamp-link' expr:href='data:post.url' rel='bookmark' title='permanent link'><abbr class='published' expr:title='data:post.timestampISO8601'><data:post.timestamp/></abbr></a>
        </b:if>
        </b:if>
      </span>
</b:if>
</b:if>
</b:if>

You will have to replace URL OF Selected Post with your selected page link.
Save your template